Friday, 18 July 2014

More bendy rollers heatless curl experiments

In this former post (Bendy rollers post 1) I described my first two attempts at using bendy rollers to get heatless curls. I didn't keep the rollers on for a long time in my first two attempts, so the resulting curls fell down too quickly for my taste.

I tried again, on post-wash slightly damp hair, and this time with smaller sections (8 vs 4 in the former attempts) because I wanted smaller, more defined curls rather than loose waves-curls. I also left the rollers on for a bit longer, 3-4 hours if I remember correctly (vs under three in the former attempts).  The resulting curls were, in both cases, more defined and did stay on for longer, although my stubbornly straight hair doesn't want to keep curls and waves for as long as I'd like no matter what I do *pouts*

-Third attempt (in order to reenact Frigga's Coronation updo, first post here (Frigga's Coronation updo: 1st take, part 1):


 Like I mentioned in the former bendy-rollers post, the drawbacks that these curls have for me is the lack of volume. I can get lovely, very defined curls, but my fine hair ends up clumped together in those curls and it makes the impression of less thickness and volume. And if I shake the curls in order to volumize the hair, it results in less defined curls and, often, frizziness and tangles. Btw, don't take me wrong, less voluminous curls are completely fine, but when it comes to wearing my hair loose, I prefer more voluminous curls, like the ones I get with the bandanna-curls process. These defined curls, however, I find great for updos and half-up, half-down styles. For example, for a half-updo like this one:

Only the lower ends are curled. Style is a ponytail with the length wrapped around it twice and secured with a hairstick;


Monday, 26 May 2014

Thor - Frigga's Coronation hair analysis

  • Description:
-Film: Thor I (2011)
-Character: Frigga

Very voluminous bun, high on the head, with defined pin curls. Several front sections at the front and each side seem to have been separated and pinned up, decorated with pins, before putting the rest of the curls up, giving a textured feel to the sides of the head (before finding the last reference pic shown here I thought these side sections had been pinned after the rest of the hair was up, so my first recreation is off in that respect). Subtle left-side part.
  • Reference pictures (for larger pics, click or open them in a new tab).

Great reference for the way the starting front and side sections were pinned:
                                          
                                          
  • For this style I used (tutorial  and pics coming in next post):
-Bobby pins (open bun pins and some closed).
-Donut/foam hair piece/fake hair piece to add volume (optional, depends on your thickness).
-Decorative pins for the front and sides.
-An elastic for the ponytail.
-Comb and/or brush.
-Optional fixator, like hairspray
-Optional bendy rollers for added initial texture. However, curly hair is not needed for pin curls.
  • Videos that can help figure out the style:
1-The first style in this video is a high bun with curls. They're not as defined as Frigga's, and the shape is different as well, but the I find the visual info on how to create and pin these kind of defined ringlets useful. Only I'd stay away from that much backcombing. It really isn't necessary in order to get quite a lot of volume if you're attempting a pin-curls bun, in my opinion. General volume can be adquired with a donut or any other filling, but you don't need to backcomb every hair strand, that's really damaging to the hair. I personally only backcomb in order to get front pompadous (like with Missy's hair from Doctor Who).  I also don't think it's necessary to hairspray each and every strand - the pins are enough to keep the shape more or less defined, and hairspraying the finished style is enough to keep it in place. As for the volume, I have ii/iii hair (near the 'thick' category), but it's still very fine and pretty non-voluminous - and yet, I got the impression of quite a lot of volume when pinning curls in this way, without any backcombing. 


2-This style is similar to Frigga's in look, although the separate front sections are pinned differently, it's a bit less voluminous, and the texture is also different: The curls aren't defined curls like Frigga's and the technique in order to get them is different. Also, although the final result looks very nice, imo, the technique isn't very hair-friendly. Pulling on the hair sections like that means mechanical damage, something I'm not willing to try on my hair. 
                                            https://www.youtube.com/watch?v=wB7anbl59w4

3-Spirals instead of curls, and different bun shape (no side sections, less wide), but interesting because it shows how to add volume with a donut when trying these kind of styles. 

4-This updo with pinned curls is lower on the head than Frigga's but I think it might be one of the styles that's closest to Frigga's coronation bun. There are pinned curls and side sections that are added later (in Frigga's case, her separate front and side sections are added before pinning the rest of the curls, though, and they're pinned higher on the head as well). However, it's a great starting reference.

 I reenacted Frigga's style mostly following this video, and these are the things I'd like to change for my second try:

-Seeing as this updo is lower than Frigga's, and my resulting updo turned out quite low as well, I'd need to start with a high ponytail instead of with a half-up like in the video (after pinning the front section).

-I used a volumizing plastic hair piece to add a bit more volume, but next time I'll go for a ponytail with a donut, like I do with Missy's Edwardian styles (also with pin curls in series 9). A donut will give me more volume and it's also more hair-friendly (it was pretty hard to remove the plastic thingy, and it ended up causing a bit of breakage. Ah, the time before my using foam donuts were hard xD).

-I pinned the side sections after having the rest of my hair up, following this tutorial, but Frigga's side sections are pinned before, and higher on the head (I only found that last reference pic after trying the style for the first time).

SwordWomanRiona / rionashairblog.blogspot.com.es
If you copy-and-paste this post and/or alter it without any permission, credit or link, you're stealing my content. In that case, please stop. Please ask before using my work, or at least share it properly, giving credit to me and my blog.

Tuesday, 13 May 2014

Heatless curls: Bendy rollers. Experimenting for fem!Sherlock cosplay hair

My first heatless waves/curls tutorial-experiment in this blog! I have very straight hair, but I also love the wavy/curly look, so I'm really interested in different ways to make my hair wavy/curly. Or at least, as wavy/curly as possible, because that's one con of my hair, it's incredibly hard to curl. It's so fine-textured and so stubbornly straight waves and curls don't come out as defined as I would be expecting and/or don't stay in my hair for as long as I'd like them to stay. Ah well. Some techniques do yield better results than others, though, and I'm still experimenting.

I'd also like to say, I'm not a heat tools fan. Heat styling - hairdryers to style the length, straighteners, curling irons, and the like - can really damage the hair, especially if they're used too often. And no matter what all the commercial tutorials say, no amount of synthetic-ridden heat protectors are going to protect one's hair from that amount of breakage-causing sizzling heat. And all those synthetic-ridden 'nourishing masks' aren't going to magically restore one's hair to its former glory (so you can sizzle it again with more heat), either *facepalms*
 Anyway, I personally prefer heatless methods when it comes to try out waves and curls. No damage except for potential tangling in some cases (because my hair is so fine, it tangles too easily). Also, in the case of stubbornly straight hair such as mine I guess heat curls wouldn't last longer on my hair than heatless ones. So at least the heatless ones don't damage my hair. 

 And speaking of stubbornly straight hair, I'm still testing different hair fixators so that the waves/curls stay longer. The problem is, most hairsprays and curl-enhancing mousses are very drying and not at all healthy for your hair (and many of them don't seem to work all that much on my fine straight hair either), so I normally don't use them. More hair-friendly fixators would include salty-water and aloe vera gel, which work moderately on my hair. They are not especially strong-hold, though. Quite light-hold, in fact.

Anyway, first heatless technique of this blog, bendy rollers curls. These pics are from my first try, back in December when I was trying to curl my hair a bit for my fem!Sherlock cosplay. 

  • How-to:
Post-shower or relatively damp hair is usually vital when it comes to a heatless curling method. I either go for 90% dry post-shower hair (my best option) or misting my hair with a spraying bottle just before. For more hold, the spraying water can be salty water, or clear aloe vera gel can be used as a mousse. These are hair-friendly hair-fixators, albeit not really strong. You could also use a curl-enhancer mousse or some hairspray, but these are not as hair-friendly.
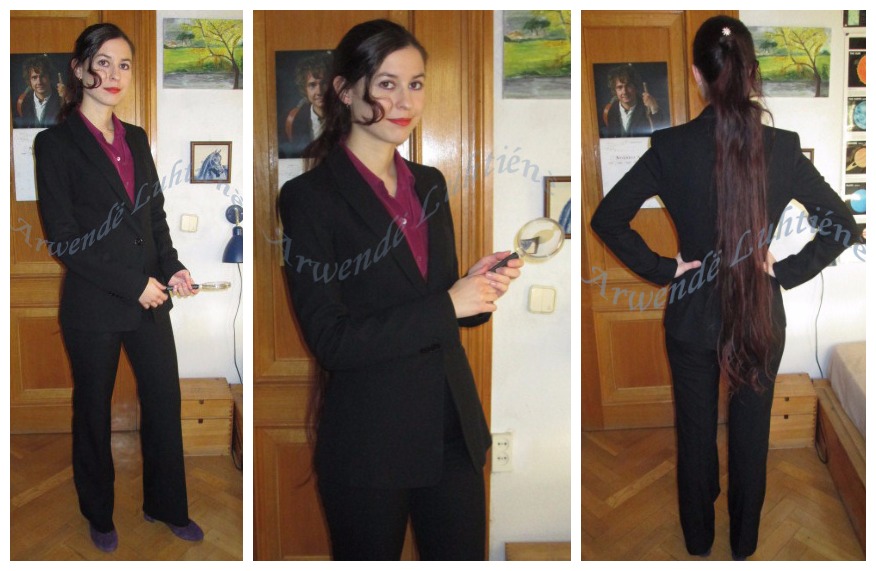
You'll need: Bendy rollers, small claw clips to secure each section. Gloves and magnifying glass are just part of my Sherlock cosplay :D
                           
   This is, in my opinion, a really easy and relatively fast curling technique. You need a package of bendy rollers (which you can usually find on drug-stores and general supermarkets), and some claw clips to secure the sections.

  1) Section your hair (smaller sections give tighter curls, larger sections result in larger looser curls/waves).

  2) Wrap each section in a bendy roller, starting at the top of the head (it can also be done from the ends to the top, but I find this more difficult for my own hair). Each section should be wrapped as securely as possible (without being overly tight and uncomfortable), so that it doesn't unwind with time. Once the hair is completely wrapped around the roller, bend its two ends in a tight (but comfy) U shape over the middle, creating a small bun secured by the roller. If wrapped tightly enough, and with the roller bent adequately, the hair should stay put without unravelling until it's going to be unwrapped. 

   3) I use some claw clips to secure some of the resulting buns to my scalp, so that they don't bounce around and become uncomfortable. I think this is one of the most comfy heattless curls techniques I've tried, the bendy rollers are pretty weightless and although I do look pretty ridiculous (not as ridiculous as with rag-curls or henna, though :D), my head doesn't feel heavy and the buns sit snugly without hurting my scalp, which is a huge plus.

More visual instructions here: 
http://www.alovesvintage.co.uk/2013/04/heatless-hair-tutorial-curling-hair.html (hair is wrapped from the ends to the top, instead of from top to ends).
https://www.youtube.com/watch?v=rh4PGm9CMtU (each roller is further secured with a small claw clip, which I don't usually need. I also begin the wrap the hair around the roller closer to my scalp so that it doesn't hang a lot, which I find uncomfortable).
http://media-cache-ec0.pinimg.com/736x/dc/20/3b/dc203b69704e1dbc7ba542f0e2a0c2e6.jpg (another method, starting with a high ponytail. Looks practical).

The longer you keep the rollers on, the more defined the curl will be. In this case, I think I didn't keep them for a long time, three-four hours maybe. On my last attempt, I kept them for a bit longer, and the resulting curls were way more defined.

The final result, just four sections (not very tight curls), and 3-4 hours in. 
   -Pros: Easy, comfy technique, hair doesn't tangle when unravelling the rollers, yields nice, reasonably defined curls (depending on the number of sections and the time you keep the rollers on).
   -Cons (for my hair): The sections make my originally non-voluminous hair clump together, giving the impression of even less volume. I find this is a nice technique to get defined curls for an updo or ponytail, not so good for loose hair, especially if I want it to be relatively voluminous - bandanna waves or braidwaves work way better for that, in my experience.

  Also, as usual, my long, straight hair makes the curls fall down too quickly. These were taken just an hour after I unwrapped the hair from the rollers. The fact that I didn't keep the rollers for a long time counts as well. 

And rehearsing my fem!Sherlock cosplay hair (just with a black elastic), which is actually a crossover between Molly and Sherlock, it seems :). As usual, don't mind the house-clothes :D!

When I finally cosplayed fem!Sherlock for my graduation I didn't have a lot of time to keep the rollers in, and the resulting curls fell way too quickly, even if I dared to use some hairspray (which just dried out my hair until I washed it again, yay for my sacrifice). Also, the bangs came out very weird. But overall, I enjoyed cosplaying Sherlock for my graduation, so yay :)

-Update: I now use salt water sprays (like Lush's Sea Spray) as a fixator in order to get the curls to stay (I spray my hair when it's it's coiled in the rollers and wait overnight). It generally works pretty well for m  
Next bendy roller pics will feature more defined, tighter curls, courtesy of a longer settling time and more sections.
SwordWomanRiona / rionashairblog.blogspot.com.es

If you copy-and-paste this post and/or alter it without any permission, credit or link, you're stealing my content. In that case, please stop. Please ask before using my work, or at least share it properly, giving credit to me and my blog.

Thursday, 10 April 2014

Hairstyles - Half-ups

This post is mainly a pic overload of different half-ups I've tried (click for bigger pics):
  • Three-strand braided half-ups:
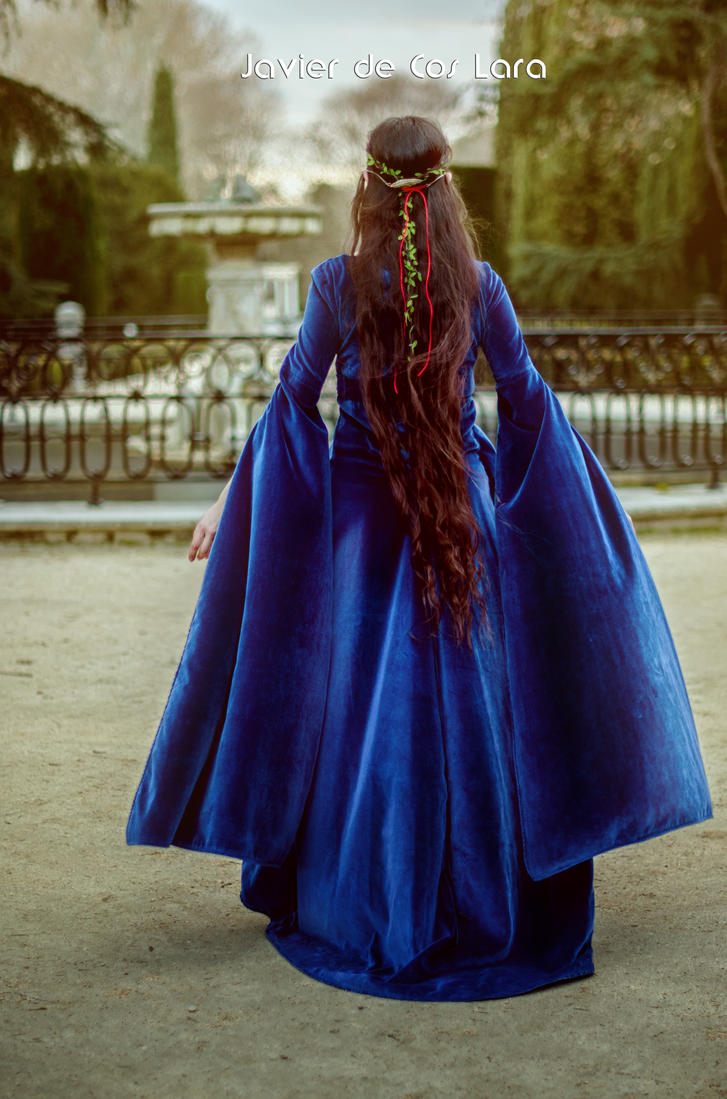
   A very simple, yet very Elvish half-up, in my opinion.  
 
✨A single three-strand braid at the back:


Three-strand side braids held together at the back in another three-strand braid (or just two side braids):
 

Three-strand braid at the back:


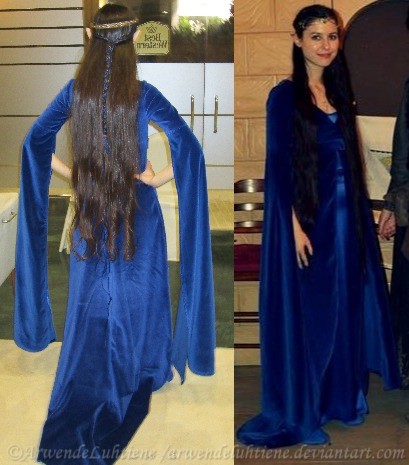
Elven cosplay styles, also featuring side braids:


Elven-ranger cosplay multi-braided half-up: Individual post here.


Two three-strand side accent braids knotted together:
  Just experimenting one Summer day (don't mind the clumpy, braidwave-free ends xD That's what happens when you want braidwaves but forget about the tassel *mental facepalm*. For heatless waves, I'd say either braid all the way down to the ends, as far as you can get, or my favourite, bandanna/bendy rollers waves for the braid's tassel. Unless you like this kind of wavy-then-straight look, of course. Everyone is different.)
                           
  • Rope-braided half-ups:

 
Two rope side braids held by decorative pins and braided into another rope braid at the back:

  • Fishtail-braided half-ups:
I handle the fishtail (more or less) when braiding my 3-strand braid tassel...but I still have a practice a lot if I want to do a full/half-up fishtail braid from the top. Yes, I've hardly practiced this braid.
 
-2022 update: I'm getting the hang of it more now, and usually wear it with my Elrond cosplay


  • Just two pieces of hair held back with an elastic and/or barrette:
 (left one)


  • Bunned half-ups:
Cinnabun:
I generally use the elastic I use to secure the two side pieces of hair as an anchor for this little bun, same as I'd do with a full bun. You can also bun the sections without any elastics, of course, I just find this easier because my hair is so slippery.


Rose bun: Individual post here

 
Braided bun with parandas+side braids: Aka the Eärien style from Rings of Power S1 (with added parandas). Individual post here


SwordWomanRiona / rionashairblog.blogspot.com.es
Do not copy-and-paste this post and/or alter it without any permission, credit or link. Please ask before using my work, and share it properly, giving credit to me and my blog.