Showing posts with label braided ponytail. Show all posts

Wednesday, 15 September 2021

Cosplay styles - Elven ranger high braided ponytail


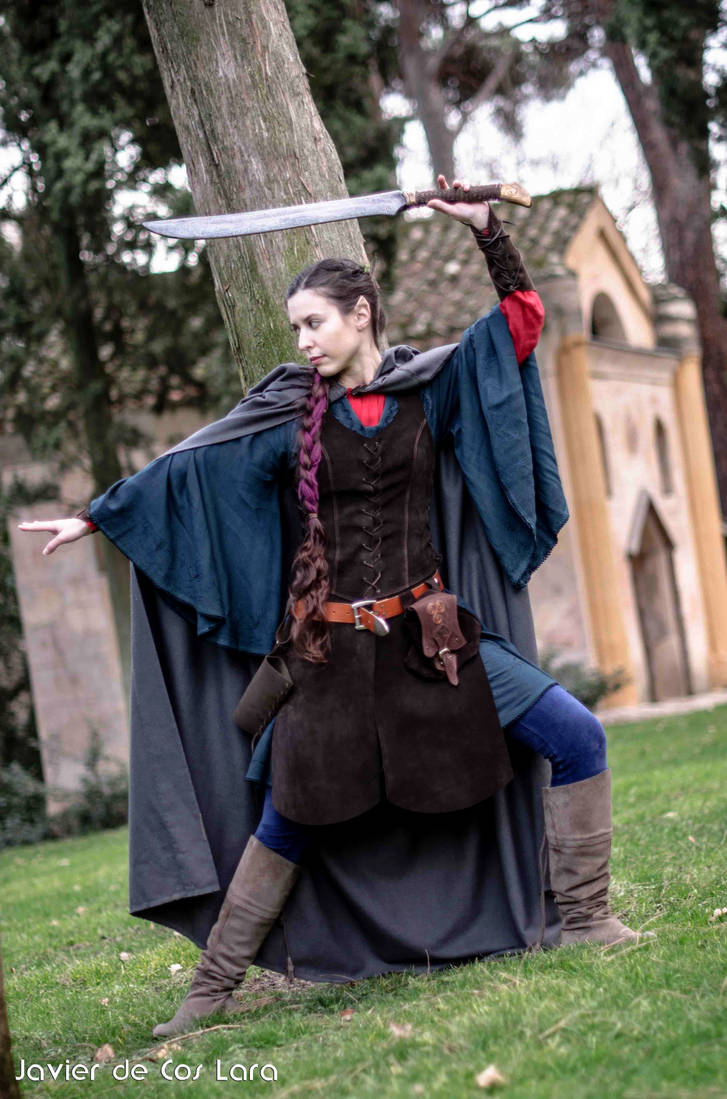
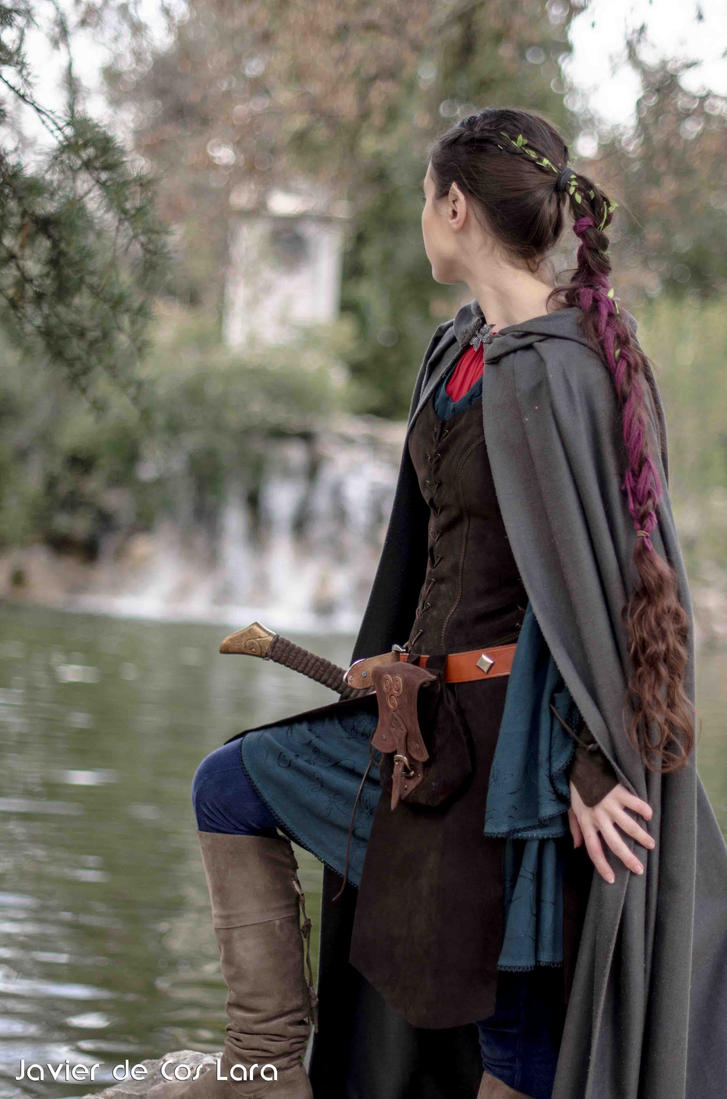
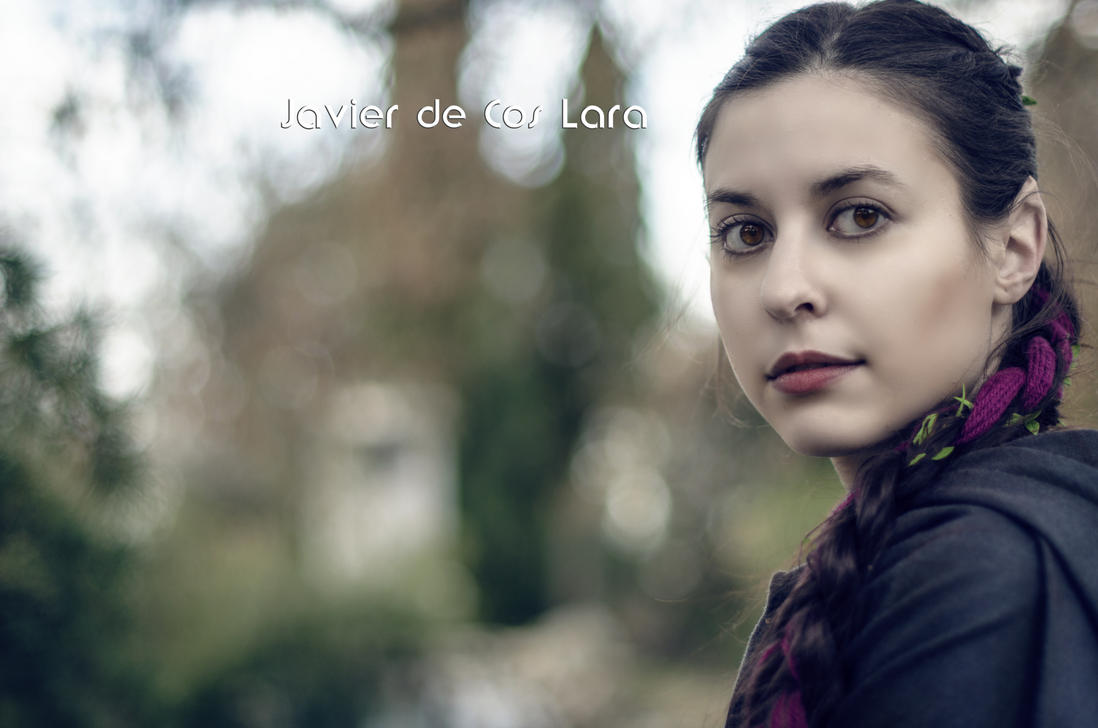
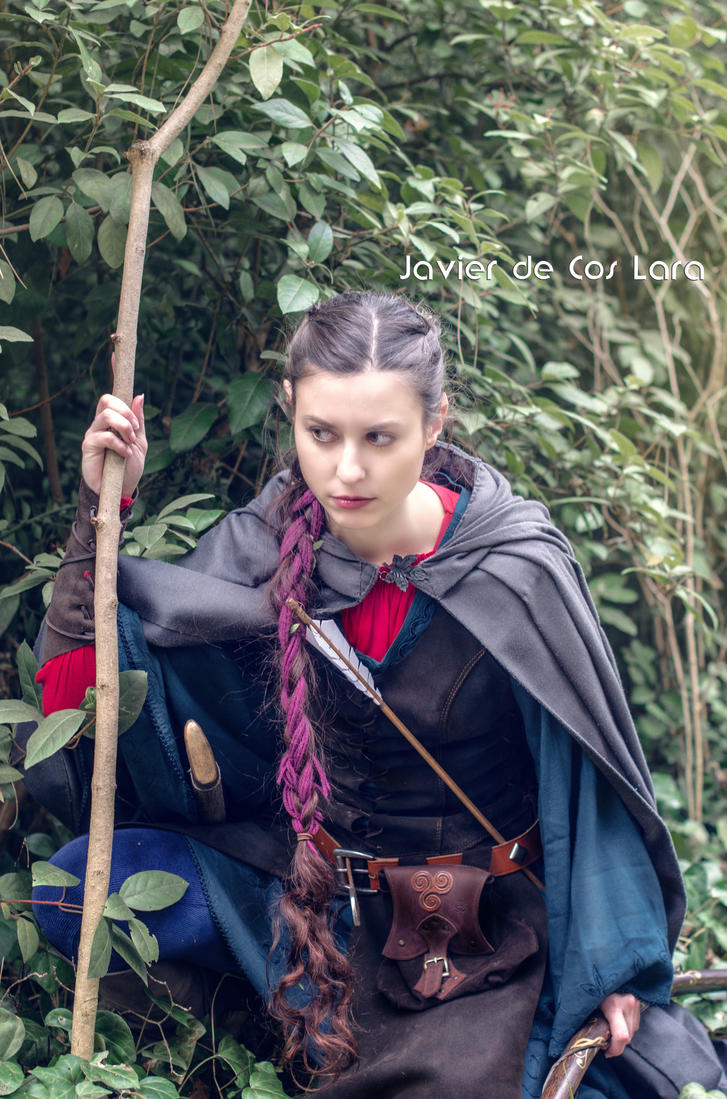
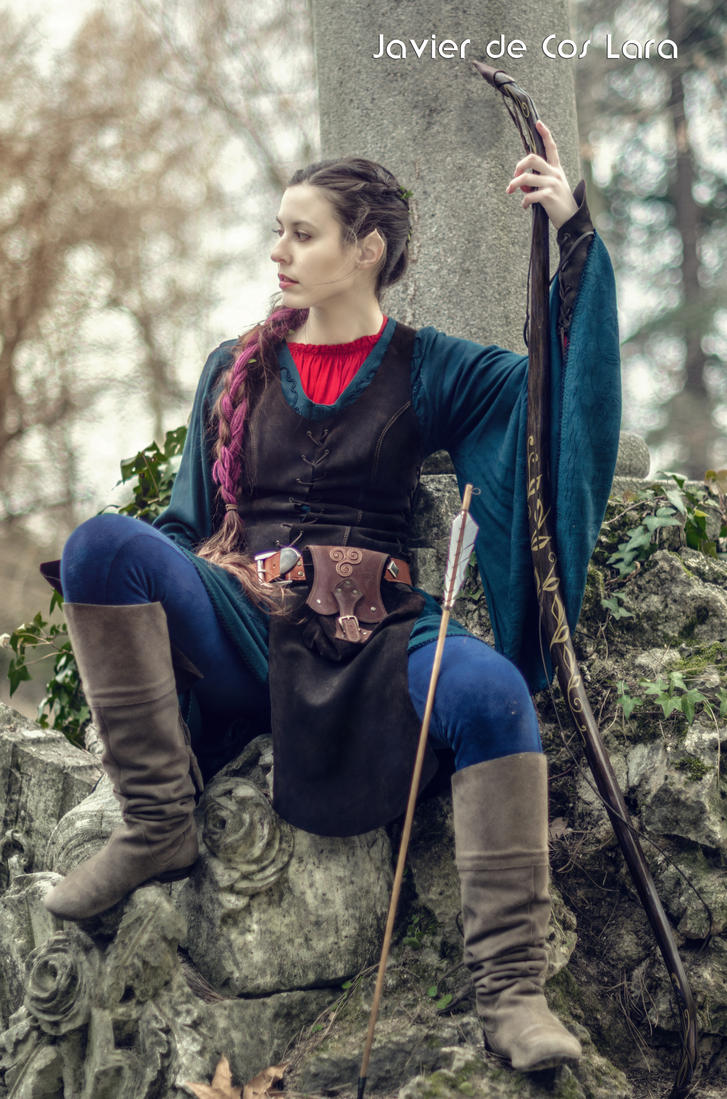
Another hair cosplay post for today, featuring the style I generally wear for my Elven ranger cosplay and some shots from a 2015 professional shoot by Javier de Cos Lara. It's a high ponytail with a paranda and two side braids with leaf ribbon braided into it, actually very similar to the style I later wore for my warrior Lúthien variation, minus the front volume and flowers.

  • For this style I used:
-Wide-tooth comb and/or gentle brush as needed
-A metal-free elastic for the initial ponytail
-Open pins and/or bobby pins to fix the side braids
-Paranda for the braid
-Leaf ribbon for the side braids
-Hairspray and/or fixing gel as needed  

  • Steps:
 Initial texture can be straight, wavy or curly as desired. I did some bendy rollers curls in the ends for this style.

1) Side braids: Separate two side pieces of hair and braid them, adding ribbons (in my case, I used leaf ribbons).

3) Braided paranda ponytail:
-Pull the rest of the hair into a high ponytail - mid-height is my preference. 
-Add the side braids before securing it with a metal-free elastic. I then fix the side braids to the sides with bobby pins and/or open pins as needed.
-Braid the ponytail, with a paranda for added volume (tutorial also here). 


 3) Final touches:
-I use a couple of open bun pics to polish some flyaways at the nape.
-Add aloe vera gel and/or a bit of hairspray to set the style and potential flyaways (if you want), and it's done!
 
More pics!


SwordWomanRiona / rionashairblog.blogspot.com.es
If you copy-and-paste this post and/or alter it without any permission, credit or link, you're stealing my content. In that case, please stop. Please ask before using my work, or at least share it properly, giving credit to me and my blog.

Monday, 4 November 2019

Cosplay styles - Warrior Lúthien beribboned multibraid

 
I really like the hairstyle I came up with for my ☄️ ⚔️Warrior!Lúthien cosplay variation ☄️⚔️ :D. It's a braided paranda ponytail with side braids and a front pompadour, decorated with leaf ribbon and flowers.

My warrior!Lúthien is heavily inspired by the fanart headcanons that Elven fashion is markedly oriental-inspired, especially in the Silmarillion First Age (and that Elves are often of non-white ethnicities as well, as the 'Elves are all a Caucasian white race' is something we really need to disprove, at least in the fandom areas :S). I found this gorgeous blue-and-black pants+tunic silk ensemble with flower embroidery (I think it might be a Vietnamese áo dài?) at a 2107 convention and instantly thought of Lúthien in a more warrior mode (as opposed to using magic and badassery alone, which is equally amazing, of course). Head over to my cosplay Instagram if you want to see more of my cosplays at @arwendeluhtienecosplay !
 

  • For this style I used:
-Backcombing comb 
-Fake hair rats for the pompadour
-Hairspray and/or fixing gel as needed
-Wide-tooth comb and/or brush as needed.
-A metal-free elastic for the initial ponytail
-Open pins, bobby pins
-Paranda for the braid
-Leaf ribbon
-Plastic decorative flowers
-A leaf barrette
  • Steps:
1) The front pompadour
 
- Separate a front section of your hair, flip it upside-down and backcomb it gently with the comb. You can hairspray the section before teasing for a better hold. This backcombing helps create more structure in the hair so that the shape will hold better and longer. 
You can also create front volume without backcombing, but I find it easier with a bit of teasing because my hair is so straight, fine-textured and slippery.

-I use fake hair rats under that backcombed front section to create the volume I want. Comb the hair over the hair rats very gently (so as not to destroy the teasing we just did xD) and shape the pompadour the way you prefer. Then secure it in place with bobby pins at the back of the head. 
 
-I used a leaf barrette over the place where I secured the pompadour at the back to hide the bobby pins.
-Use hairspray as needed.

About backcombing: I backcomb sporadically for cosplay, and reenactment, and, by keeping it gentle and always in the root area (never the length or tips!), I don't think it particularly harms my hair. I always use a Tangle Teezer to remove the backcombing tangling at the end of the day, and the hair loss is minimal (if any, sometimes). The fake hair pieces/hair rats are the main helper when it comes to achieving the desired volume, so I only backcomb to the point when I can get a bit of structure to hold the hair rats in place without the pompadour loosing its shape. 
Hairspray also helps too keep it all in place, but of course, it's not very good for the hair to use a lot to often. Having greasy-prone roots, hairspray actually doesn't dry my hair overmuch xD, but I get a lot of build up and it's generally not very hair-friendly, so my daily fixator is aloe vera gel, and I only use hairspray, and certainly this amount of it, when I need to have a large pompadour going on and/or a more complex hairstyle staying in place for the whole day xDD

2) Side braids: Separate two side pieces of hair and braid them, adding ribbons (in my case, I used leaf ribbons).

3) Braided paranda ponytail:
-Pull the rest of the hair into a high ponytail - mid-height is my preference. 
 -Add the side braids before securing it with a metal-free elastic.
-Braid the ponytail, with a paranda for added volume (tutorial here).
 
 3) Final touches:
-I use a couple of open bun pics to polish some flyaways at the nape.
-Add the decorative flowers along the side braids, near the base of the ponytail (the flowers can also partly hide the elastic), and/or along the braid as well, as desired.
-Add aloe vera gel or a bit more hairspray to set the style and potential flyaways (if you want), and it's done!
 
Pic gallery:
  • May 2018 


  • At the 2019 EstelCon (annual convention of the Spanish Tolkien Society). Featuring Tai Chi, archery, singing and helping out at a conference xD


SwordWomanRiona / rionashairblog.blogspot.com.es
If you copy-and-paste this post and/or alter it without any permission, credit or link, you're stealing my content. In that case, please stop. Please ask before using my work, or at least share it properly, giving credit to me and my blog.

Monday, 2 September 2019

Hairstyles - Knotted braided ponytail (Valkyrie hairstyle variation)

 Today's hairstyle tutorial is a braided variation of the knotted 'Valkyrie Ponytail', which I learnt thanks to Janet Stephens' video:


This length-shortening updo/half-up is pretty easy and fast to do and very comfortable to wear. It's great for when you don't want to wear all your hair up, but also want to keep it a bit contained. Also, the knot tends to keep the dangling braid hanging a bit further away from the neck and shoulder area, and thus prevents it from getting stuck in stuff more easily. I've been wearing both the standard Valkyrie ponytail and my braided variation (either three-strand or rope-braid) as a weekly staple for nearly a year now :D. Recorded tutorials will be coming soon, but in the meantime here are some written instructions as usual :)

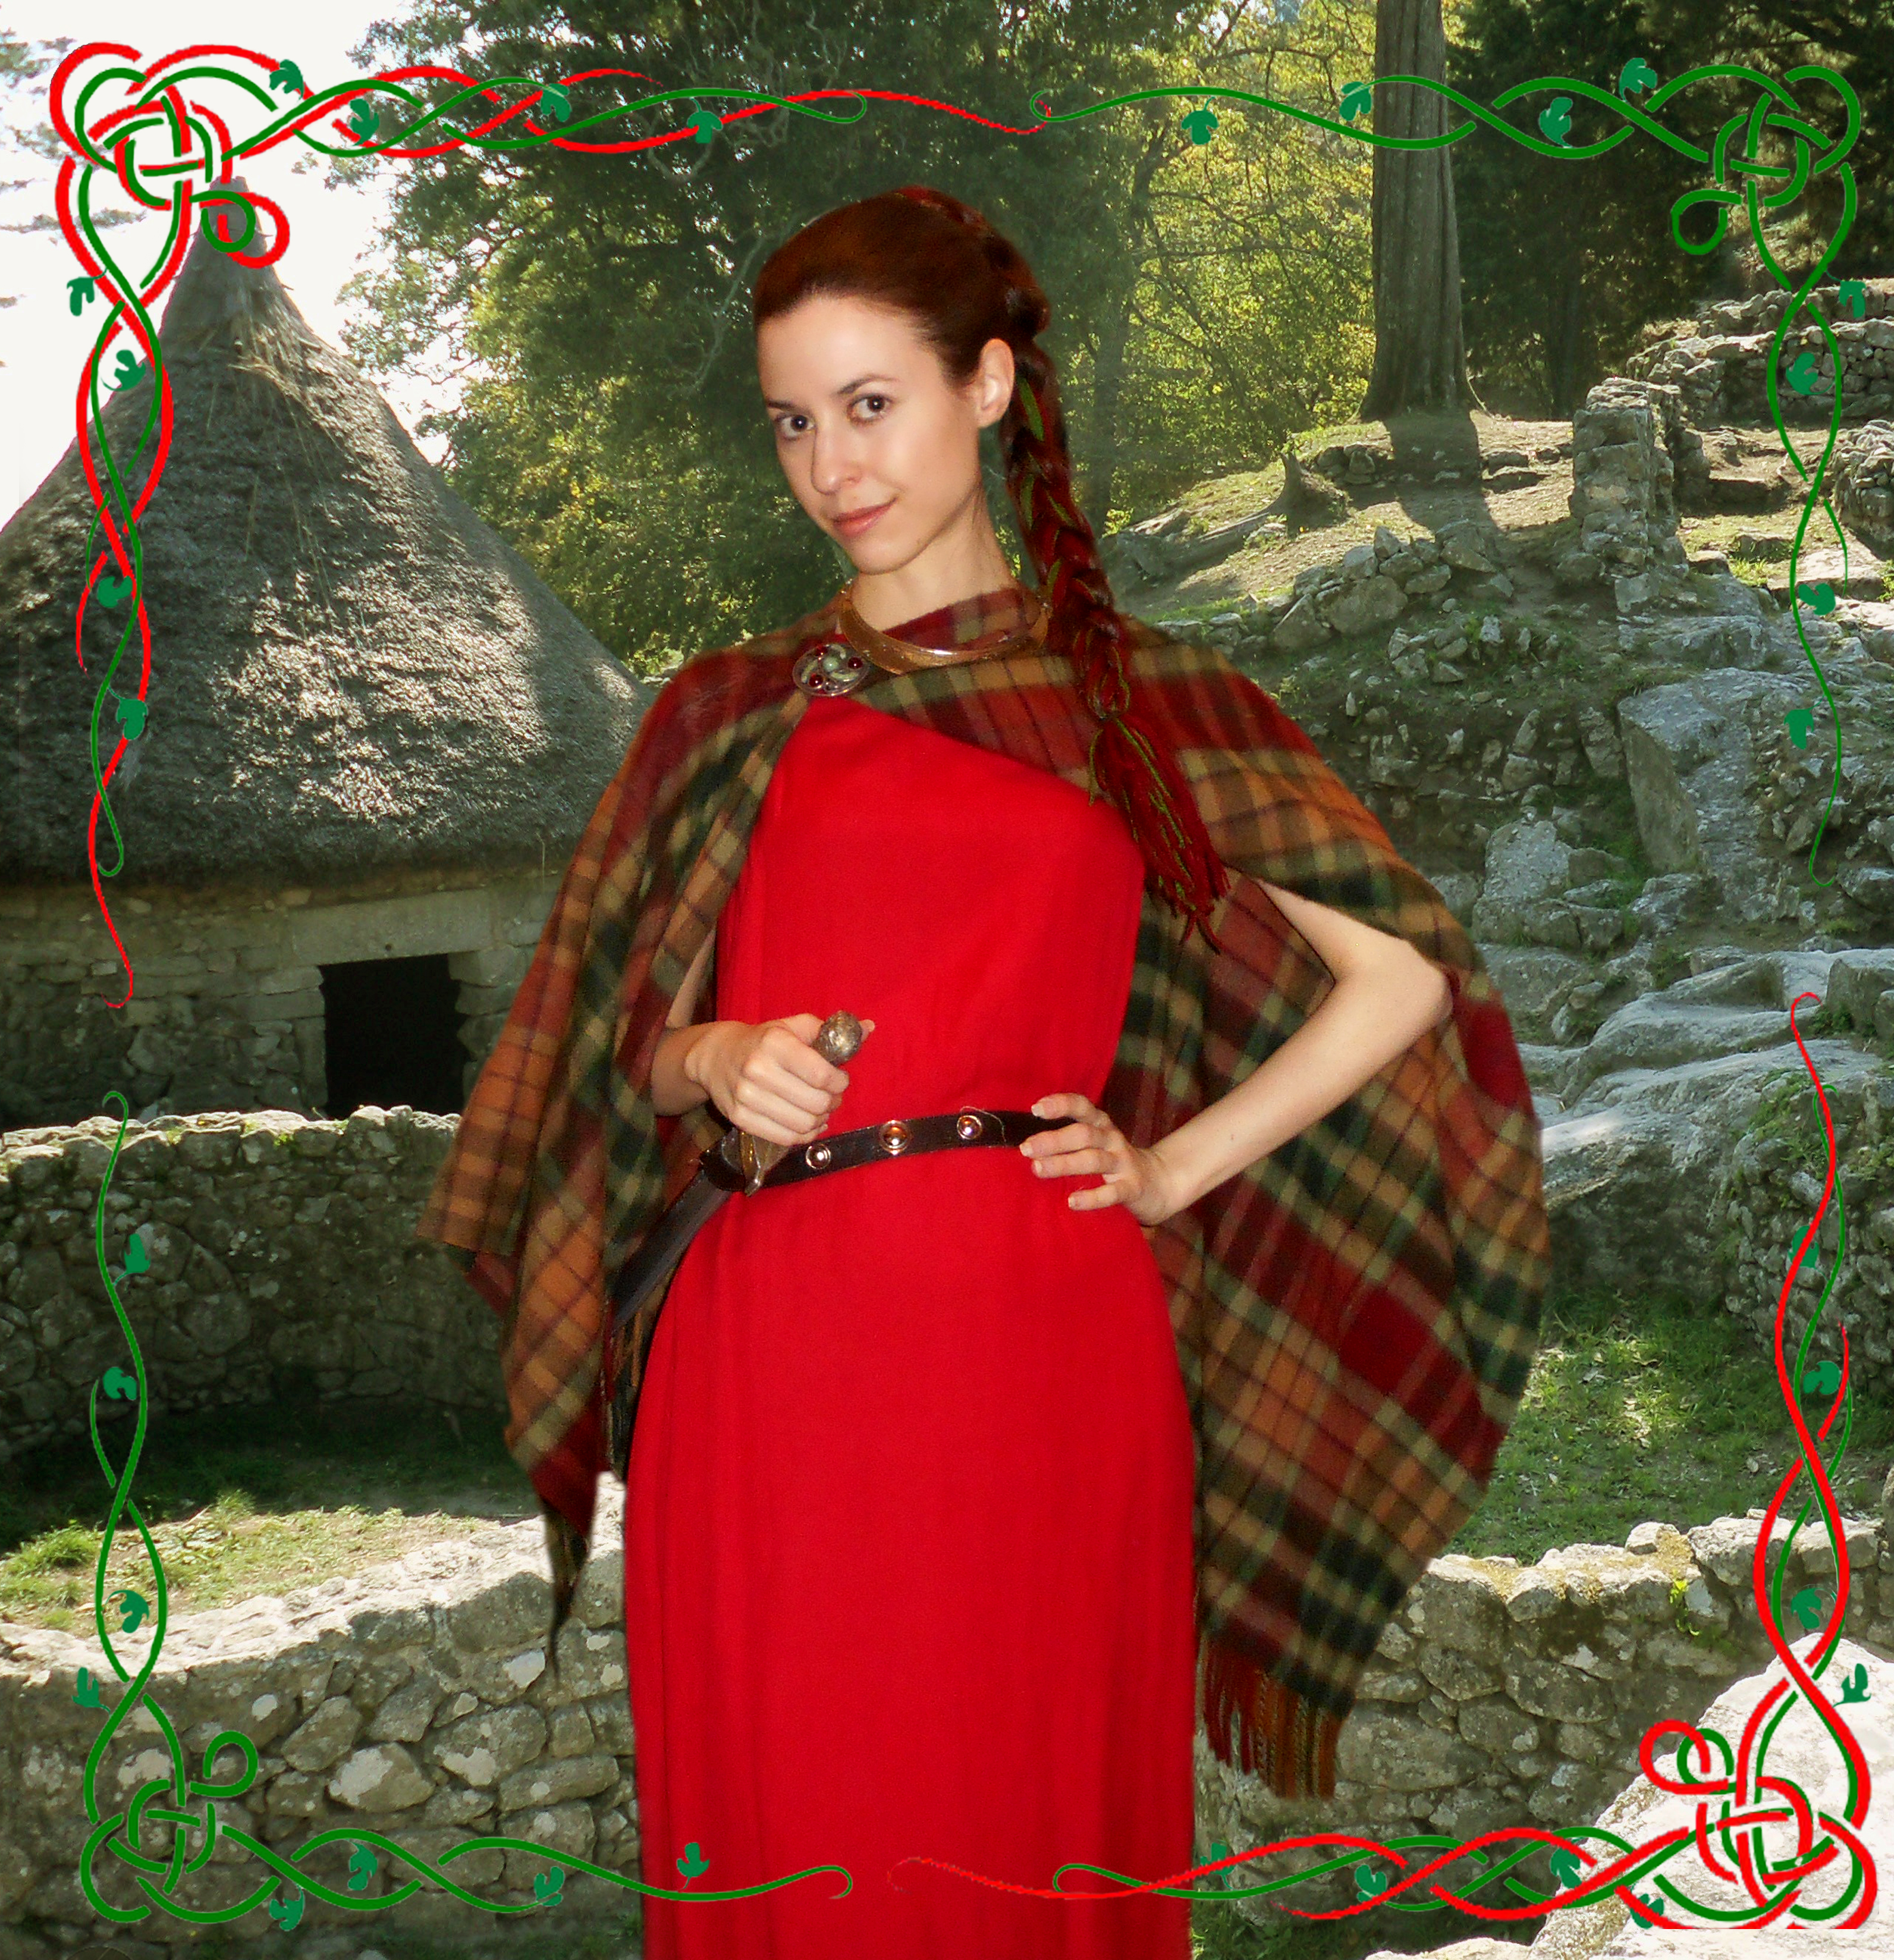
These pics are from an August outing and feature my red and green paranda . This ensemble always kinda reminds me of a Roman priestess for some reason 😃 xD


  • For this style I used:
-Comb and/or brush as needed.
-A metal-free elastic for the initial ponytail
-Paranda for the braid
-Hairstick
-Open pins for final touches

Steps:
 
-Pull the hair into a high ponytail - mid-height is my preference.
-Braid the ponytail, with a paranda for added volume (tutorial here). It can be a three-strand braid, or a rope-braid, for ex. 
-Now comes the knot - Same as described in the video above, but with the braid. The knot is enough to hold the hair in many cases, but I prefer to further secure the style using a hairstick. This also looks nice, and ensures that the hanging braid stays out of the way in a comfortable way.
-I use a couple of open bun pics to polish some flyaways at the nape.
-Add aloe vera gel or hairspray to set the style and potential flyaways (if you want), and it's done!

Pic gallery of this style: 


Tolkien ranger OC cosplay (2018):


Celtic sword-woman casual reenactment (2019):


 Medieval-inspired outfit with Merida's kirtle and cloak (2025-26):


SwordWomanRiona / rionashairblog.blogspot.com.es
If you copy-and-paste this post and/or alter it without any permission, credit or link, you're stealing my content. In that case, please stop. Please ask before using my work, or at least share it properly, giving credit to me and my blog.