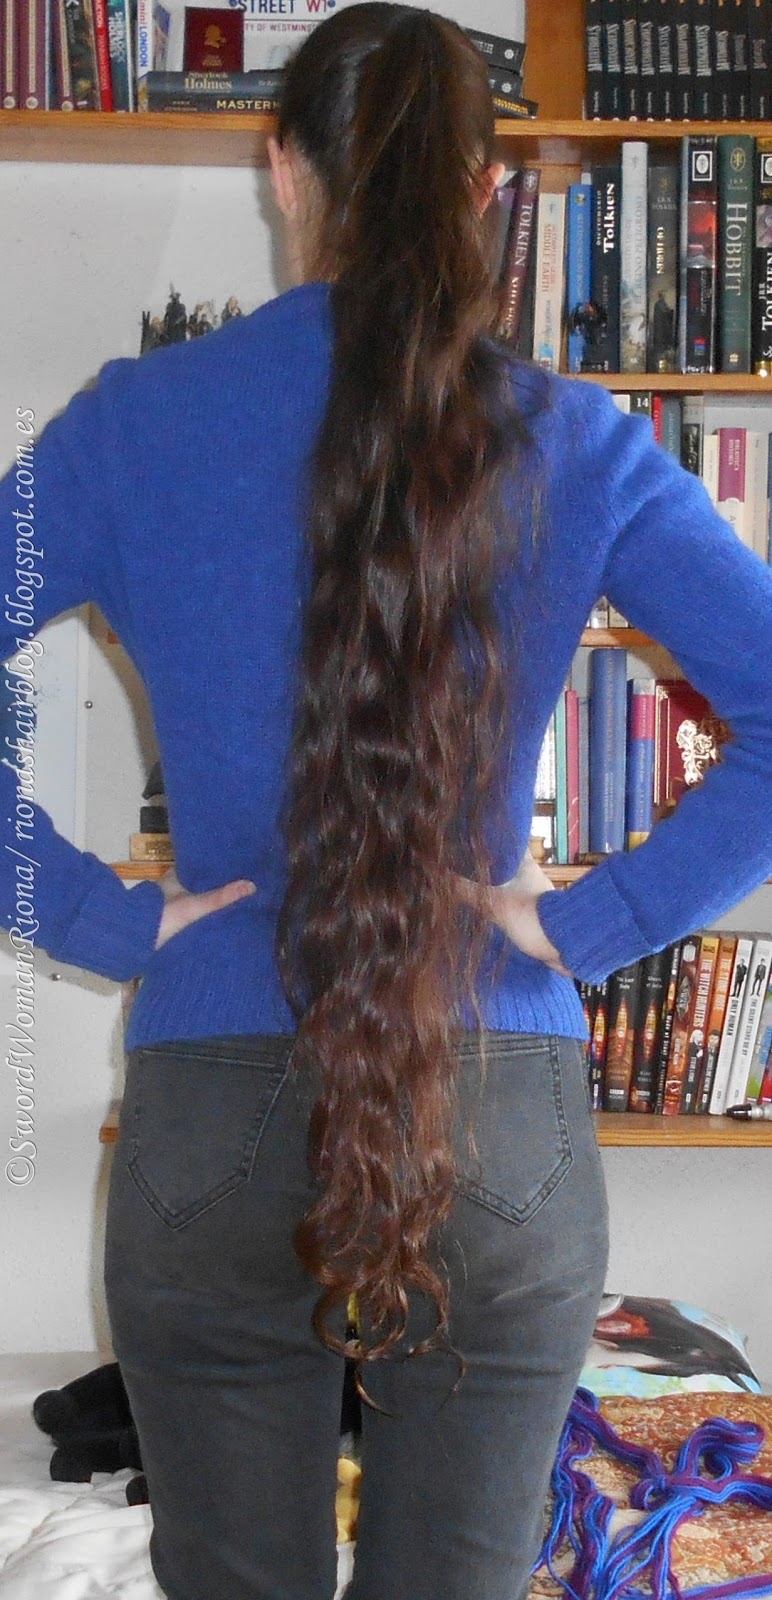
PhD work and other things mean I haven't updated this blog since December 2016 :S xD, so here is a random post with some pics from the last couple of months - Featuring braidwaves and heatless bendy-roller curls, and length shots of sorts (although with the added texture and the ponytails/half-ups, the real length is actually shortened).
Did some experimentation with braidwaves+bendy-roller curls on the ends mainly in February. Hemline still needs thickening up, hoping it does with some more maintaining, if not I'll consider trimming back to fingertip or something because I'm missing my thicker, blunter ends...But at the same time I also like being at knee, so we'll see xD
-Braidwaves plus bendy-roller curls (ends are still clumped together because of the rollers I generally prefer to leave them that way to avoid frizz xD):
-Looser bendy-roller waves, hardly any braidwaves;
-More braidwaves, tighter bendy-roller curls at the ends:
SwordWomanRiona / rionashairblog.blogspot.com.es
If you copy-and-paste this post and/or alter it without any permission, credit or link, you're stealing my content. In that case, please stop. Please ask before using my work, or at least share it properly, giving credit to me and my blog.
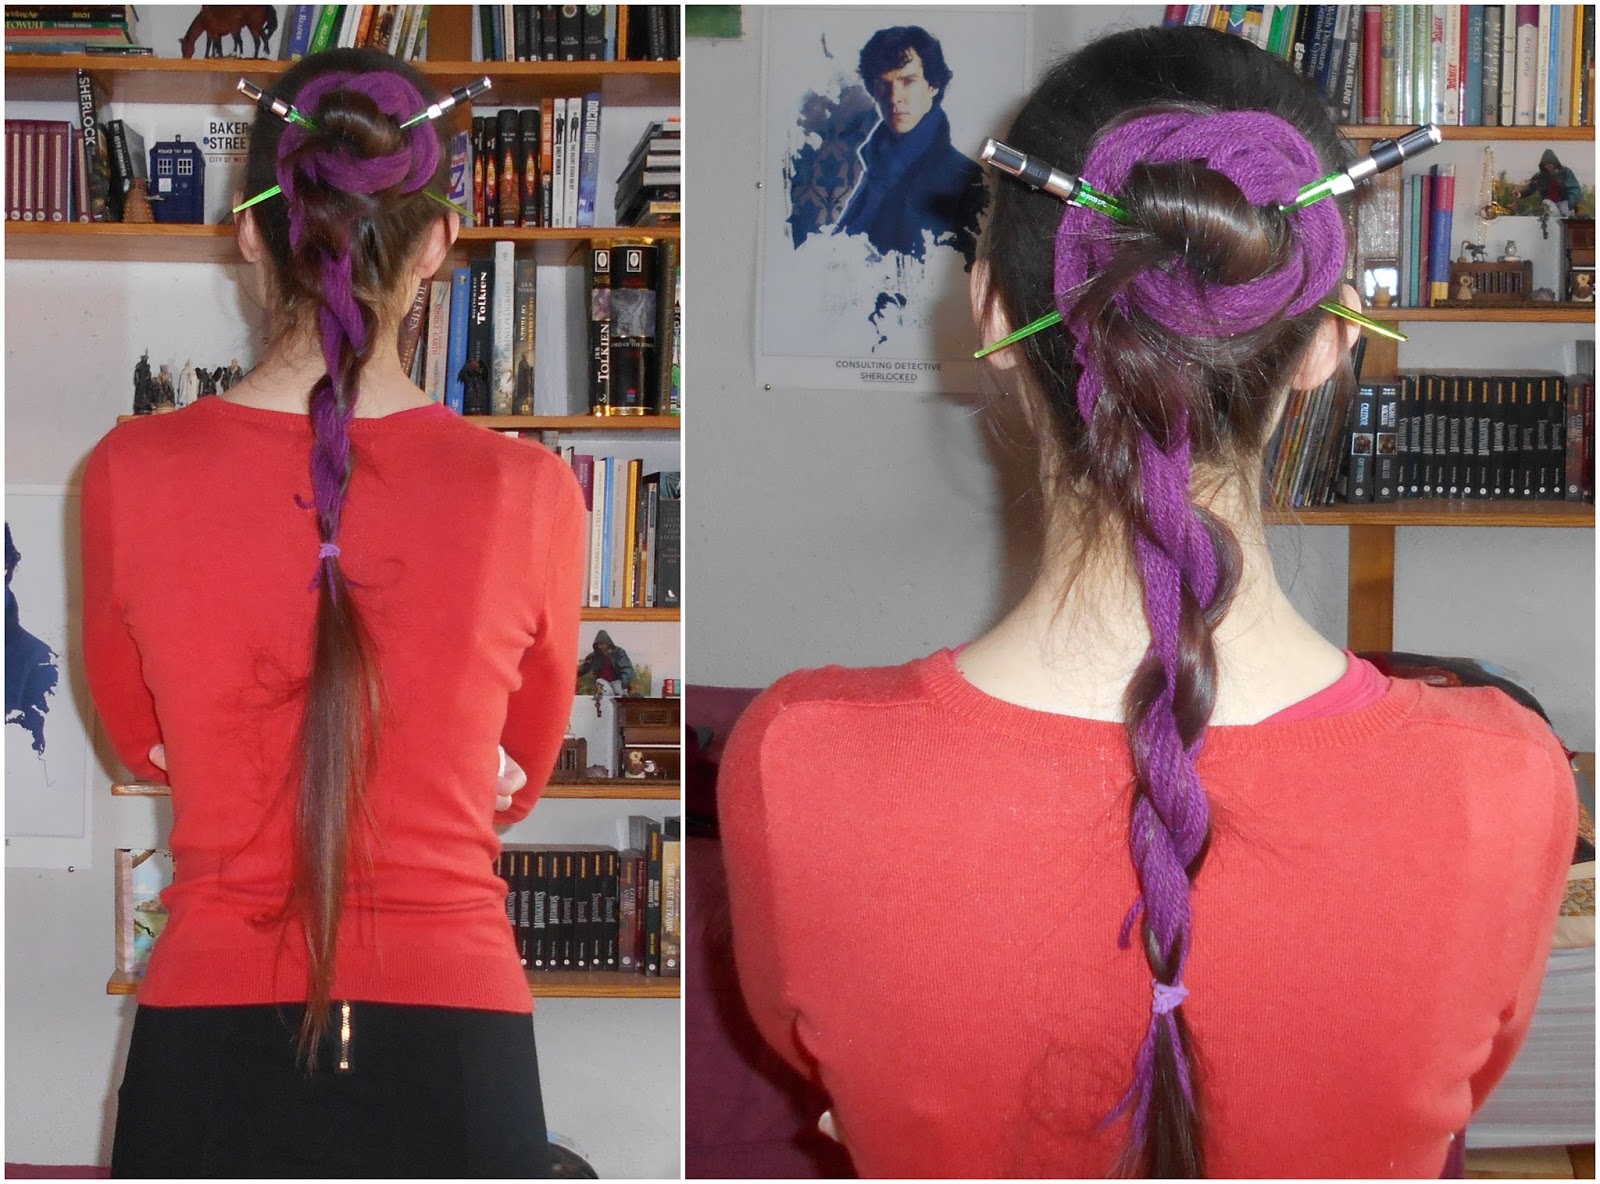
In today's post, I'll be showing two length-shortening buns (I also call them half-updos). These are great if you want to put up your hair but still show some length, or if you want to experiment with shorter lengths for a change :)
1.Rope-braided length-shortening bun
I wear this one fairly often. It involves rope-braiding and parandas.
For this style, I used:
-An elastic without metal for the initial ponytail.
-A paranda (info about making parandas and braiding them into hair here). The paranda is optional, but a nice addition if you want added volume, hold and colour.
-Astick, flexi-8 or clip.
-Optional claw-clips and/or open bun pins for added hold.
Steps:
Video tutorial:
1. Pull your hair into a high ponytail and secure it with a hair-friendly elastic without metal. I find this style works best on medium to high ponytails, but of course, that depends on your personal likings.
2. Divide your hair into two parts. We're going to rope braid it adding a paranda.
The rope braid is, in my opinion, one of the simplest braids alongside the three-strand braid. Here is a tutorial. When you add a paranda, the method is similar (see video tutorial above): First of all, instead of three sections you want the paranda to have two, given that this braid only has two sections. I do this by dividing the middle strand of the paranda equally between the left and right one. Then you add one section to each section of hair and twist the two combined hair+paranda strands to form a rope braid in the usual fashion. Be extra careful not to let the paranda slide down when you start twisting!
3. Now you have a rope-braided high ponytail, to form the length-shortening bun you start coiling the length around the ponytail base, leaving some of the length hanging down. With my knee-length hair, I usually coil the braided length twice (which gives me a waist+ shortened length). The number of times you wrap the length around the base will depend on your initial length, and on how long you want the shortened braid to be.
4. Secure the part that's up in a bun with a clip, flexi-8 or hairstick. I usually add a couple spin pins, small claw-clips or some open bun pins in order to add a bit more hold to the finished style so that it stays put for the whole day.
2. I don't have an specific title for this second style, it was improvised. Low coiled length-shortening bun?
The starting point is loose hair with a simple half-up (side strands of hair held at the back with a small elastic and/or a decorative clip). I then gathered the loose hair into a low ponytail (without tying it with an elastic), and coiled some of the length into a cinnamon bun, pinning it with some open pins. In my experience (I have very fine-textured slippery hair), this style wasn't very secure, and the bun fell in a short space of time. I'd need an elastic as base and more hold when securing the bun. Also, I generally don't favour low buns because they scrape my nape and I find them uncomfortable.
SwordWomanRiona / rionashairblog.blogspot.com.es
If you copy-and-paste this post and/or alter it without any permission, credit or link, you're stealing my content. In that case, please stop. Please ask before using my work, or at least share it properly, giving credit to me and my blog.
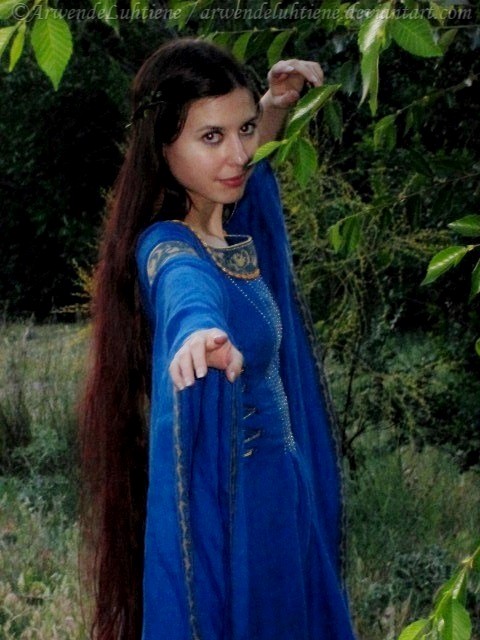
In a recent post, I talked about the braid I came up with for Lúthien's cosplay. In this one, I'll be posting some pics loose variation, which is the style I usually wear when I'm cosplaying Lúthien Tinúviel from Tolkien's Silmarillion: hair loose with heatless curls on the ends and a simple braided half-up with leaf ribbons, gems and/or small white flowers.
First variation (May 2014):
3-strand side braids braided with leaf ribbons and gathered at the back with a leaf clasp. Small green gems as decoration.
Texture: Subtle braidwaves and bendy rollers curls (which had transformed into very loose waves by the time this pic was taken):
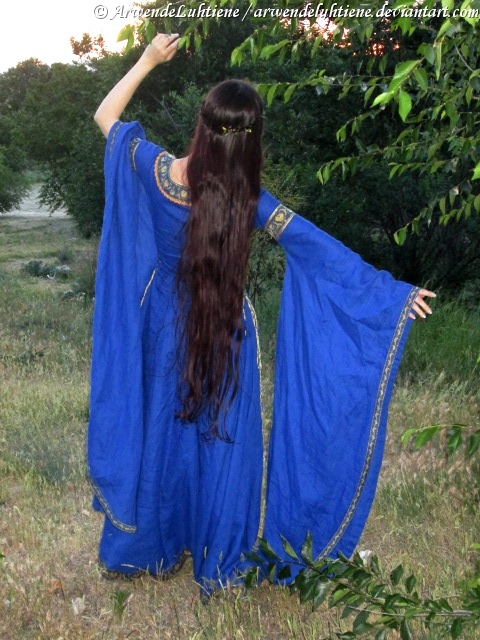
Second variation (April and December 2014):
Lúthien is usually described as wearing flowers intertwined in her hair, so I finally got some small plastic flowers and added them to the half-up. I went for two versions, one with the side braids with the leaf ribbon, and another one without the leaves, 3-strand side braids gathered at the back of the head in a half-up and adorned with some of these white flowers:
This is a very blurry pic, but hey, hair's looking long :)!
Texture is, once again, braidwaves and heatless bendy rollers curls in the ends. Contrary to rag/bandanna curls, bendy rollers curls make my hemline look quite thinner than it actually is, which isn't bad per se, mind, but seeing as I unfortunately am quite thick-hemline-obsessed, it does bug me a little xD
Third variation (September 2015):
Very similar to the second one, but with more flowers and leaf ribbons. Variation with braid here.
SwordWomanRiona / rionashairblog.blogspot.com.es
If you copy-and-paste this post and/or alter it without any permission, credit or link, you're stealing my content. In that case, please stop. Please ask before using my work, or at least share it properly, giving credit to me and my blog.
This is the style I did for the singing end-of-term concert at my music academy. A length-shortening updo with bendy rollers heatless curls on the ends:
Texture: Braidwaves + bendy rollers curls on the ends.
-More posts about my bendy rollers experiments here
After braiding my post-shower mostly-dry hair in a three strand braid with a paranda, I wrapped the ends around a bendy roller, secured it with an elastic and sprayed the ends and some of the length with salty water generously (I use Lush's Salt Sea Spray). I wore my hair like that for nearly a day and took the bendy roller and the paranda off just before the concert. These below are the results at the end of the concert (roughly two hours after I took the bendy roller off).
The Salt Sea spray gives me quite a lot of hold, especially when I leave the roller on at least overnight. The curls do fall a bit after a few hours, but I retained waves in my hair until the next time I washed it. Cons for me are that, even though this salty spray is infinitely heathier and more effective than hairspray for my hair, it can get a bit frizzy and tangly, and I generally oil my ends generously with jojba or sweet-almond oil to avoid dryness after these sporadic times when I need a lot of fixation (I have yet to try flax seed gel as a (moisturizing!) fixator, Henrietta recommended it to me, and I really want to try it out).
This style is very similar to the cinnamon half-updo here, only with curls at the ends. I used a couple of spin pins and a Gimli axe hairstick (I sang Hobbit songs :) ) to keep the cinnamon bun part in place. And in this case, I added an accent braid at each side, gathered into the high ponytail with the rest of the hair before bunning it.
SwordWomanRiona / rionashairblog.blogspot.com.es
-The site www.fashionlita.com is stealing quite a lot of material from this blog, even though I've tried to block their IP twice so that they wouldn't be able to steal any more posts of mine. I wanted to mention that those posts were copied and pasted from my blog without my permission.
More bendy rollers curls! Plus bonus ponytail length shots :)
-Read about my bendy rollers experiments here and here
I used just a bendy roller on my ends, and left the rest of my post-shower hair braided with a paranda. I sprayed quite a lot of salt water on the ends just after I wrapped them around the roller (Lush's Sea Spray Light Mist, especifically. I don't like a lot of things about Lush. For one, they claim to be oh-so-natural, but still use non-natural ingredientes such as parabens and cocamide DEA, which is actually carcinogenic - it's misleading and pretty ironic of a 'natural' hair-and-body shop to add such an ingredient to some of their products. Plus their sexist policies when it comes to doing anti-animal testing activism. Still, I have to grudginly admit that I do like this product). And wow, next day when I undid the roller, the curls lasted for the whole day and the Sea Spray mist had given them quite a lot of hold. My hair is veruy fine-textured and stubbornly straight, and most of my heatless curls and waves tend to fall back to straightness veeery quickly, but this time they lasted the whole day. At the end of the day, the curls had fallen a bit, but they were still pretty much there:
Plus this spray mist gave me a hold that is way less damaging than hairspray, in my opinion, it hardly dried my ends at all. I oiled them slightly with jojoba oil just in case, though. I don't like to put products on my ends, but this turned out well, so I already know what to do if I need to have curls on my ends that last more than an hour xD
SwordWomanRiona / rionashairblog.blogspot.com.es
-The site www.fashionlita.com is stealing quite a lot of material from this blog, even though I've tried to block their IP twice so that they wouldn't be able to steal any more posts of mine. I wanted to mention that those posts were copied and pasted from my blog without my permission.
In this former post (Bendy rollers post 1) I described my first two attempts at using bendy rollers to get heatless curls. I didn't keep the rollers on for a long time in my first two attempts, so the resulting curls fell down too quickly for my taste.
I tried again, on post-wash slightly damp hair, and this time with smaller sections (8 vs 4 in the former attempts) because I wanted smaller, more defined curls rather than loose waves-curls. I also left the rollers on for a bit longer, 3-4 hours if I remember correctly (vs under three in the former attempts). The resulting curls were, in both cases, more defined and did stay on for longer, although my stubbornly straight hair doesn't want to keep curls and waves for as long as I'd like no matter what I do *pouts*
Like I mentioned in the former bendy-rollers post, the drawbacks that these curls have for me is the lack of volume. I can get lovely, very defined curls, but my fine hair ends up clumped together in those curls and it makes the impression of less thickness and volume. And if I shake the curls in order to volumize the hair, it results in less defined curls and, often, frizziness and tangles. Btw, don't take me wrong, less voluminous curls are completely fine, but when it comes to wearing my hair loose, I prefer more voluminous curls, like the ones I get with the bandanna-curls process. These defined curls, however, I find great for updos and half-up, half-down styles. For example, for a half-updo like this one: Only the lower ends are curled. Style is a ponytail with the length wrapped around it twice and secured with a hairstick;
Very voluminous bun, high on the head, with defined pin curls. Several front sections at the front and each side seem to have been separated and pinned up, decorated with pins, before putting the rest of the curls up, giving a textured feel to the sides of the head (before finding the last reference pic shown here I thought these side sections had been pinned after the rest of the hair was up, so my first recreation is off in that respect). Subtle left-side part.
Reference pictures(for larger pics, click or open them in a new tab).
Great reference for the way the starting front and side sections were pinned:
For this style I used (tutorial and pics coming in next post):
-Bobby pins (open bun pins and some closed).
-Donut/foam hair piece/fake hair piece to add volume (optional, depends on your thickness).
-Decorative pins for the front and sides.
-An elastic for the ponytail.
-Comb and/or brush.
-Optional fixator, like hairspray
-Optional bendy rollers for added initial texture. However, curly hair is not needed for pin curls.
Videos that can help figure out the style:
1-The first style in this video is a high bun with curls. They're not as defined as Frigga's, and the shape is different as well, but the I find the visual info on how to create and pin these kind of defined ringlets useful. Only I'd stay away from that much backcombing. It really isn't necessary in order to get quite a lot of volume if you're attempting a pin-curls bun, in my opinion. General volume can be adquired with a donut or any other filling, but you don't need to backcomb every hair strand, that's really damaging to the hair. I personally only backcomb in order to get front pompadous (like with Missy's hair from Doctor Who). I also don't think it's necessary to hairspray each and every strand - the pins are enough to keep the shape more or less defined, and hairspraying the finished style is enough to keep it in place. As for the volume, I have ii/iii hair (near the 'thick' category), but it's still very fine and pretty non-voluminous - and yet, I got the impression of quite a lot of volume when pinning curls in this way, without any backcombing.
2-This style is similar to Frigga's in look, although the separate front sections are pinned differently, it's a bit less voluminous, and the texture is also different: The curls aren't defined curls like Frigga's and the technique in order to get them is different. Also, although the final result looks very nice, imo, the technique isn't very hair-friendly. Pulling on the hair sections like that means mechanical damage, something I'm not willing to try on my hair.
3-Spirals instead of curls, and different bun shape (no side sections, less wide), but interesting because it shows how to add volume with a donut when trying these kind of styles.
4-This updo with pinned curls is lower on the head than Frigga's but I think it might be one of the styles that's closest to Frigga's coronation bun. There are pinned curls and side sections that are added later (in Frigga's case, her separate front and side sections are added before pinning the rest of the curls, though, and they're pinned higher on the head as well). However, it's a great starting reference.
I reenacted Frigga's style mostly following this video, and these are the things I'd like to change for my second try:
-Seeing as this updo is lower than Frigga's, and my resulting updo turned out quite low as well, I'd need to start with a high ponytail instead of with a half-up like in the video (after pinning the front section).
-I used a volumizing plastic hair piece to add a bit more volume, but next time I'll go for a ponytail with a donut, like I do with Missy's Edwardian styles (also with pin curls in series 9). A donut will give me more volume and it's also more hair-friendly (it was pretty hard to remove the plastic thingy, and it ended up causing a bit of breakage. Ah, the time before my using foam donuts were hard xD).
-I pinned the side sections after having the rest of my hair up, following this tutorial, but Frigga's side sections are pinned before, and higher on the head (I only found that last reference pic after trying the style for the first time).
SwordWomanRiona / rionashairblog.blogspot.com.es
If you copy-and-paste this post and/or alter it without any
permission, credit or link, you're stealing my content. In that case,
please stop. Please ask before using my work, or at least share it
properly, giving credit to me and my blog.